| Share |  |
 | |||
< Back to Kitchen Keeper Recipes
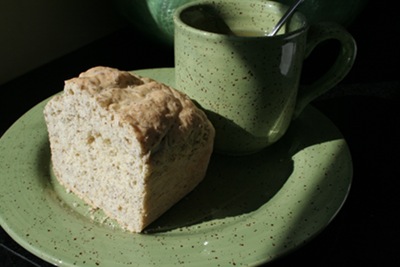
Gluten Free Basic Bread LoafDoes your local grocery store carry a fresh loaf of gluten free bread? Most would say no. But, if yes, can you afford to buy it? When I lived in a remote area of South East Asia, with no gluten free stores within the same degree of longitude, I discovered the patience of Job and the versatility of rice flour. Bread lovers, there is hope.
With several years of experimentation – amid the rising and falling of both my dough and gluten free product prices – I have finally produced a loaf comparable to that for which you’d pay dearly in an organic food market. I pass these secrets along to you with a toast to your good health.
Because gluten free flours and prepared loaves are so delicate, I do not suggest that you alter this recipe. Please read the exhaustive preparation descriptions carefully, without laughing. Believe me, you will rise up and give a standing ovation to this loaf, as it vindicates all the horrible clods of brick I’ve ever made in the mystery that is gluten free baking.
Gather the following ingredients to prepare:
- 1 ½ cups all-purpose gluten free flour
- 1 ¼ cups corn starch
- ¼ cup flax seed meal
- 1 teaspoon xanthum gum
- 1 teaspoon salt
- 1 teaspoon baking powder
- 1 ¼ cups warm water
- 1 tablespoon dry active yeast with pinch of sugar
- 2 eggs, room temperature
- 2-3 tablespoons oil
Directions:
- Preheat the oven to 350 degrees, and grease a 5x9 loaf pan with butter, not oil. Oil is too slippery to use, because the dough needs some help to “climb” the sides of the pan. That’s why the added step of flouring the pan, as you would for a cake, may also help.
- Pre-mix the following dry ingredients in a small bowl and set aside: 1 ½ cups all-purpose gluten free flour; (Usually, these specialty flours are a mix of bean flours, rice flours, sorghum or buckwheat flours),1 ¼ cups corn starch,¼ cup flax seed meal, 1 teaspoon xanthum gum, 1 teaspoon salt, 1 teaspoon baking powder
- After you have mixed the dry ingredients, then combine the wet ingredients in a separate larger bowl. As you begin dealing with the wet ingredients, be aware of the timing of your work. Gluten free breads do not naturally rise like regular breads over long sessions of kneading and rising. A gluten-free loaf will rise only once, and that’s your window of opportunity to get it in the oven to maximize its potential.
- Combine wet ingredients in this order:
- Heat up 1 ¼ cup of water to room temperature in a measuring container that has enough room to add eggs and oil later. You will eventually add this to the yeast, but not yet.
- In your largest bowl, combine 1 tablespoon dry active yeast plus no more than an eighth of a teaspoon sugar to help activate the yeast. Too much sugar can actually kill yeast! Add ¼ cup or less of the room temperature water to the yeast, and begin to stir the mixture into a paste. Try to flatten the yeast to a smooth consistency, so that the granules can interact with as much sugar and water as possible. Bubbles forming indicate that the yeast is active.
- While the yeast is activating, crack two eggs into the remaining warm water, making sure the eggs are room temperature before use.
- Add 2-3 tablespoons of oil to the eggs and whisk lightly.
- Now, add the warm water, egg, and oil mixture to the bowl of yeast and stir well. Whisk briskly to help the eggs foam up a bit. Now, the yeast should be thoroughly dissolved and continuing to activate.
- Combine the wet and dry ingredients: Add dry ingredients to the wet a little at a time, whisking with each addition. Stir until all lumps are removed. The dough should be wet, but not runny. When you draw your spoon though it, it should maintain its structure like frosting.
- Now, pour the batter into the prepared loaf pan, cover, and let rest for no more than 10 minutes. You can wet your hands with water to help smooth the top of the loaf for a prettier effect. The dough should rise a little bit, but don’t expect it to rise above the rim yet. After 10 minutes, place the loaf in the preheated oven and cook for about 33 minutes. Watch for the top to brown. Undercooking may produce a loaf that doesn’t cut well, and overcooking will produce a very crumbly loaf.
- When you take the bread out of the oven, do not cut immediately. Allow the loaf to rest and cool. Say a prayer of thanks for the miracle of baking a terrific loaf of gluten free bread.
Then, get your butter and jam ready, because this treat is irresistible!
Copyright © 2008-2015 Julie Strohkorb
Post Your Comment...
|
|
||||||||||||